 |
| Fish treats - fresh out of the oven... |
The blog post a few weeks back on "Go get meat!" "Secrets of making Amazing Cookies for training" got so much positive feedback and so many students in classes came in to class reporting they made those cookies and had amazingly willing, keen and happy workers - I decided I need to share another Favourite of Mine.
This one: Fish Bread or Fish Cookies comes from my dear friend Catherine Thomas - shared many years ago...made and baked countless times since then with many different main ingredients. Any combo of fish, though, definitely seems to be a favourite among most dogs...and well - at least one of my two-legged human kids :-)
When my daughter was just a wee toddler - she would sneak into the "Doggy cookies" (read: the container where she'd find these fish treats) and take handfuls at a time as a little savory snack. When other kids were eating a granola bar - she'd munch away on Fish bread!
So - there you go: an amazing training treat for dogs as well as a great snack for humans (those who enjoy fish)! Here's How:
Pick up some canned fish. Look for the varieties that are packed in water and are low in salt/ no added salt. Tuna is definitely a favourite as far as taste - but because of mercury, it may be a good idea to switch it up and use other types of fish also. Sardines and salmon are also winners!!
So, this particular batch, documented in photos here are made with one tin of Sardines and one can of Tuna. Heat your oven to 375 F while you prep your dough.
 Start with 2 eggs in a mixing bowl. Dump in the entire contents of the two cans of fish - liquid and all. Then add about 1 cup of water, and enough flour to mix everything into a nice, sticky and doughy ball. I tend to use whole wheat bread flour, as well as oats, but use what you have.
After mixing it all together, you will have a ball of sticky dough looking something like this (below). Dump it out on a cookie sheet covered with Parchment Paper and flatten it out until fairly thin using your hands.
Below here you have it, the whole thing spread out over a large cookie sheet. Now you could stick it in the oven like this...BUT - here's a cool thing an experiment revealed...
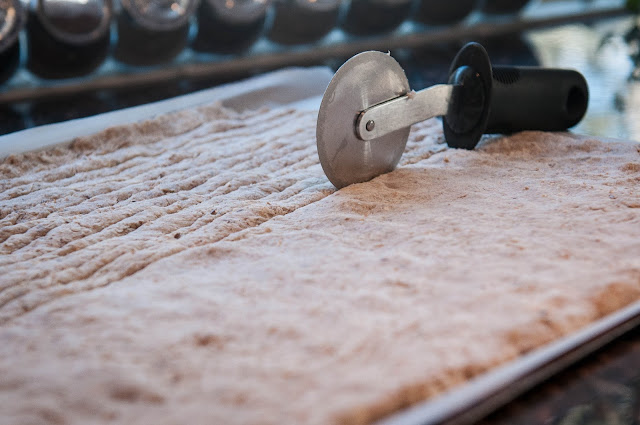
IF - BEFORE baking - you take your pizza roller-knife and drive back and forth across the whole entire "bread" - first in one direction and then in the other...
...so that you end up with this lovely pattern of tiny bits (below). And then - if you BAKE IT like this - you get these wonderful "break-apart-pieces" that are totally MADE for training: you can just take a section of bread with you as you go and the pieces literally will break apart in your hand as you just wiggle the bread around. AND it doesn't crumble much :-)
(If you don;t do this step, you still get lovely bread - but it does crumble a lot more as you break it)
After pre-cutting and driving your pizza knife back and forth twice over the entire thing - bake at 375 F.
I prefer these cookies baked on both sides...so will stick the cookie sheet in the oven and put the timer on for 25-30 min.. at which point, I pick up the whole bread with my oven mitts on and turn it upside-down (doesn't matter if it breaks in the process - as you can see mine did...). Put back in the oven for another 15-20 min.
After that - when they come out - you literally have squares breaking off like this (below). See how handy that is to put in your training bag!?
I usually divide the yield into 4-6 plastic freezer bags and keep one out (in the fridge) - and put the others in the freezer.
Awesome treats, or what?! If you decide to try them - would love to hear reports of how your dog (or child!!) received them? Please comment below - would love to hear!!!


No comments:
Post a Comment